 |
| The square pillow (the knotology basket directed by the digon graph) realized with inside-out Bassetti rubber band hinges. The bold black edge coincides with the diagonal hinge or crease. |
The
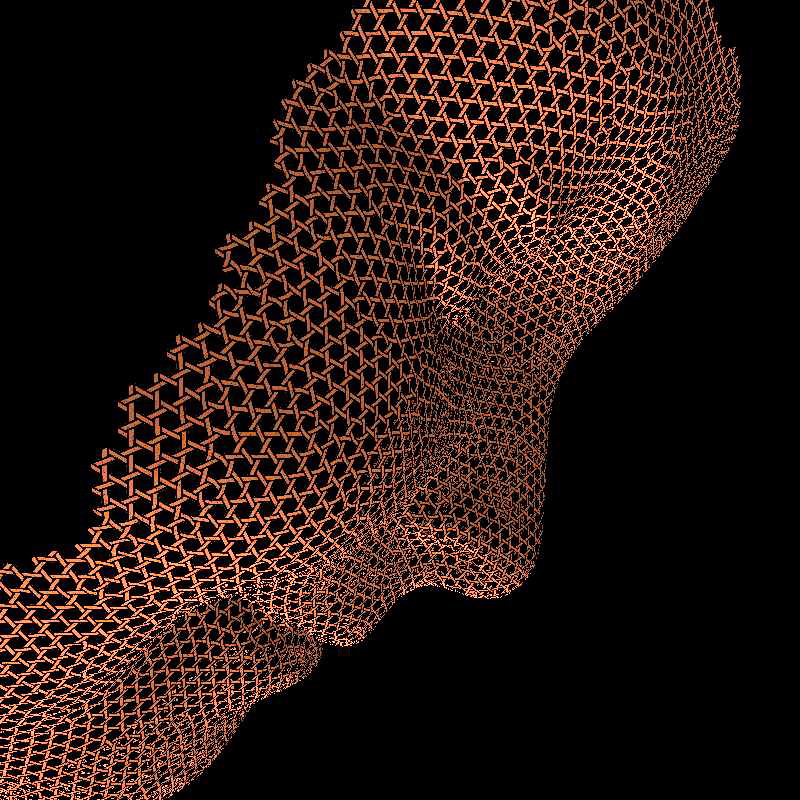
preceding post showed how knotology surfaces can be assembled from congruent isosceles right triangles. Because every hypotenuse edge in a knotology surface must pair up with another hypotenuse edge, knotology surfaces can also be seen as being composed of squares that are hinged, creased, or folded along a designated diagonal. This is probably the preferred way to model these surfaces because the number of pieces needed is reduced by half.
Square tiles with appropriately color-marked corners (as illustrated in the images here) will be called
bi-squares, because they force construction of a square-faced, bipartite
crack-graph—the graph made evident by separating the square tiles slightly—when the bi-squares are assembled with their corner colors matching.
 |
| A cardstock bi-square that has been cut and notched for attachment with Bassetti rubber band hinges. The overall size is 3" x 3". The creased internal square is 2-3/16" x 2-3/16". The notches were cut straight across with scissors after the flaps were folded flat. This size works well with the widely available Rainbow Loom elastic bands. |
 |
| The same card stock bi-square as above with the ears folded flat. |
In 1959, architect Frederick F. Bassetti
invented a good way to hinge polygonal cards together with elastic bands to form polyhedral shapes. The main drawback to making a model with Bassetti hinging is that the outside of the finished model wears protruding flaps and rubber bands. I find that it is possible, though a bit more time consuming, to work Bassetti hinges inside-out so that the flaps and elastic bands are hidden inside the model.
The bi-squares illustrated here were made from 3" x 3" pieces of 65-lb (176 g/m2) card stock, that was creased along the edges of a 2-3/16" square diamond and also along one of its diagonals. After the "ears" were folded flat, the corners were truncated with straight scissor cuts leaving clean-cornered rectangular notches that hold Rainbow Loom elastic bands fairly securely. Working carefully, one elastic band engagement at a time, and with the help of a small gauge (2-1/4 mm) crochet hook, I find it is possible to assemble the Bassetti hinges inside out. In the end, there is just a peek of elastic band showing at the corners. It also helps to pre-curl the ears a bit so that they can pass around behind the elastic band.
 |
| View from the inside of a bi-square with two pre-curled ears. |
 |
| Stage in the closure of a particularly difficult inside-out Bassetti hinge. |
 |
| Using a narrow gauge crochet hook to properly set the elastic band in an inside-out Bassetti hinge. |
 |
| Close-up view of the inside-out Bassetti hinges in the smallest knotology surface: the triangular pillow (the surface directed by the line segment graph.) |
No comments:
Post a Comment