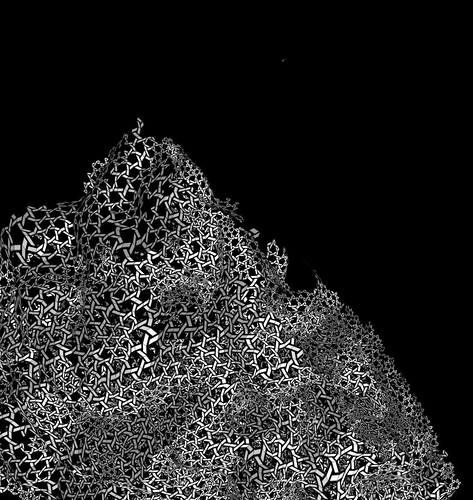
Brain contours rendered as triaxial weaving. Brain model provided courtesy of INRIA by the AIM@SHAPE Shape Repository.
Brain contours rendered as triaxial weaving. Brain model provided courtesy of INRIA by the AIM@SHAPE Shape Repository.
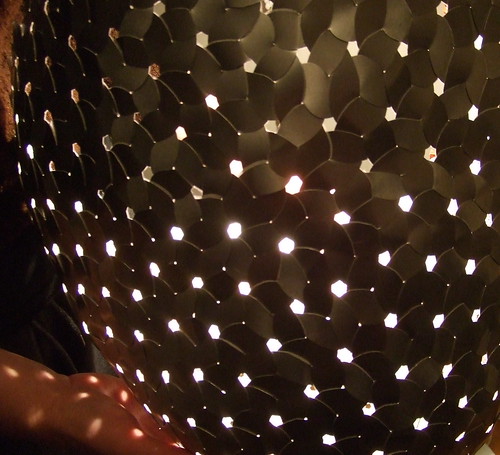
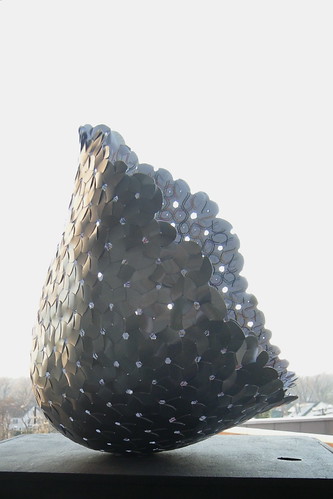
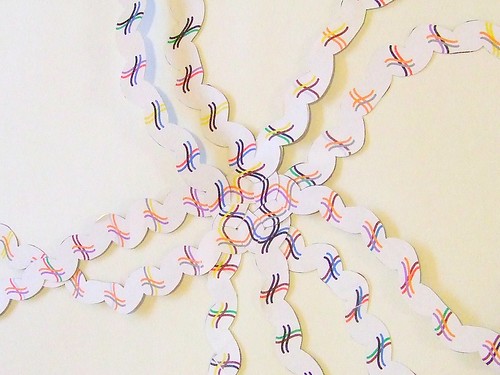
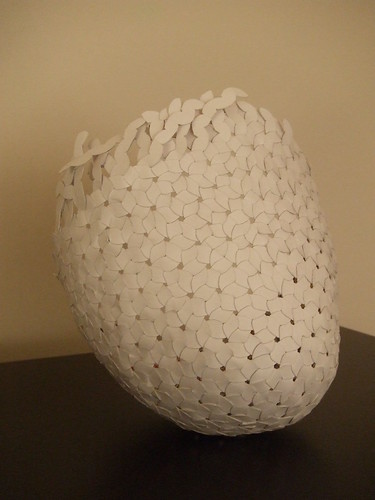
Most of my weaving experience has been with twogs, which are very short weavers that only run from one crossing to the next. Since all the twogs are usually the same length, the only way to make the basket surface curve is to connect the twogs in rings of five or seven-- or any ring number other than six (which would produce flat weaving.) One is constantly aware of ring number when weaving twogs. What are naturally called "rings" when weaving with twogs, are more naturally called "openings" when weaving with long weavers. This view of "Olivier's Fingertip" shows that the openings do not all have the same number of sides. I am happy to report that while doing the weaving I was completely unaware how many sides were in the openings I made. Once a weaver has been started in its correct position, it can only weave one way.
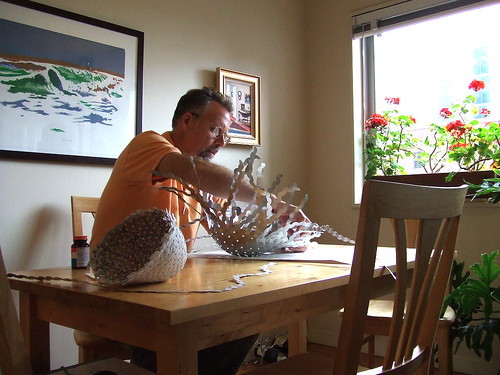
Here I am in the early stages of weaving the sculpture "Olivier's Fingertip." Later, as the piece got bigger and deeper, I shifted to working on my lap. That's the cardboard maquette on my right for reference-- it wasn't really needed. Unfortunately the bottle of rubber cement nearby was constantly needed in the nearly losing battle to keep paper templates attached to aluminum weavers.
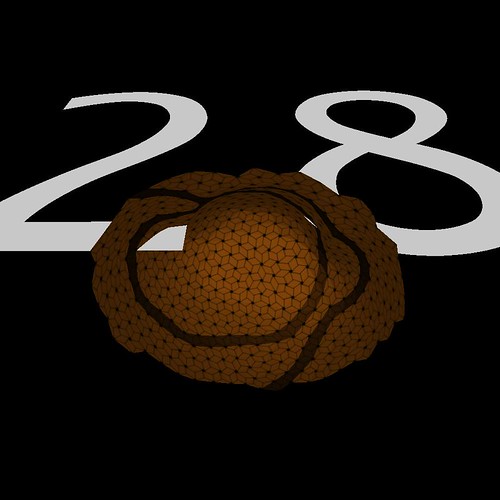
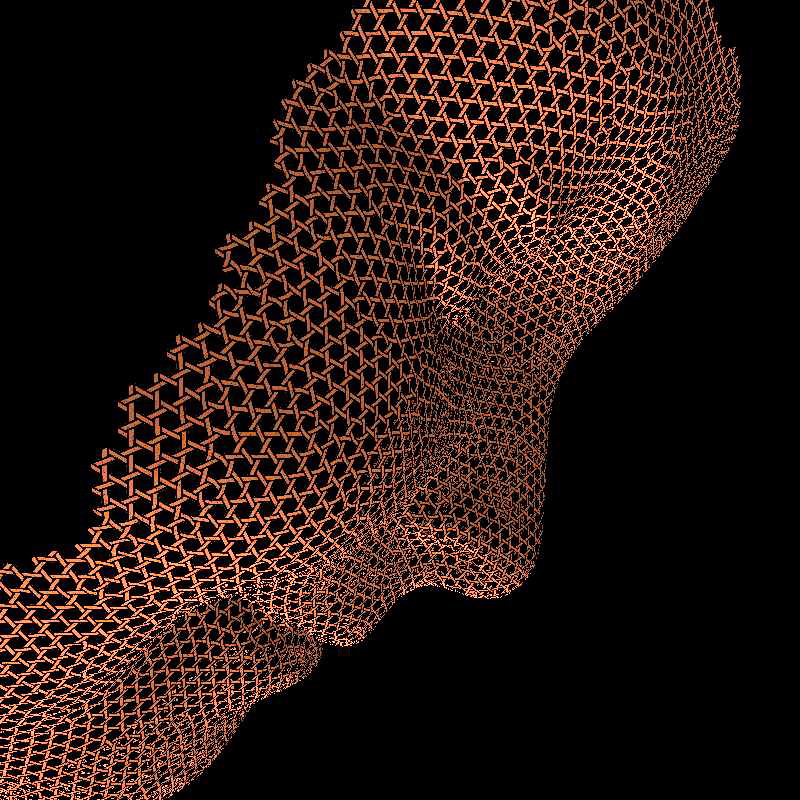
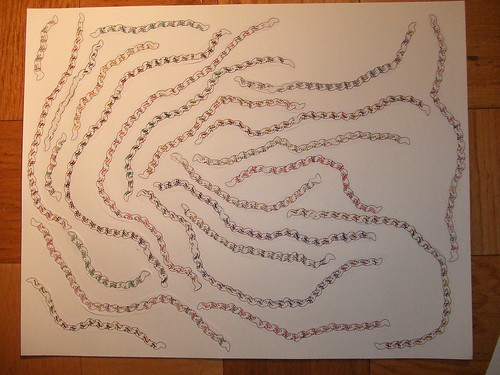
The path of any particular weaver is rather chaotic. Some are short, some are straight, but then there are ones, like weaver 28 in "Olivier's Fingertip," that loop all over the place. This computer-generated view is from inside the fingertip, looking toward the distal end (the fingernail is on top.) The triangle mesh could probably be edited to minimize outliers like this one, but in any case the need to be able to splice weavers is evident. All the weavers in "Olivier's Fingertip" are unspliced. Ones like 28 are a little too long.
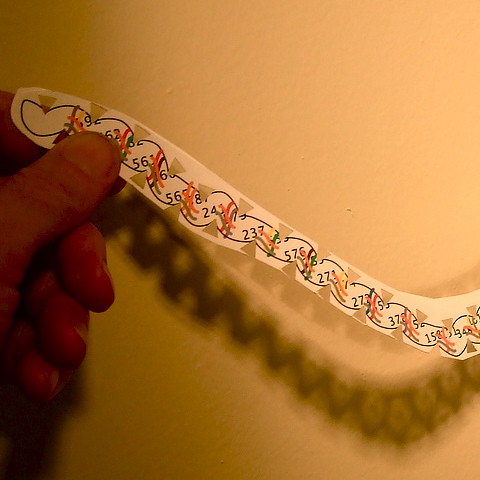
Here, interlocked, are the first six weavers for "Olivier's Fingertip." The weavers are thin sheet metal with their paper templates still glued on top. I started at the same place I had in the maquette-- though after that I got a little lost, and the weaving didn't go as smoothly as the first time. My starting point is the crossing of weavers that are rather arbitrarily numbered 37, 38, and 00.
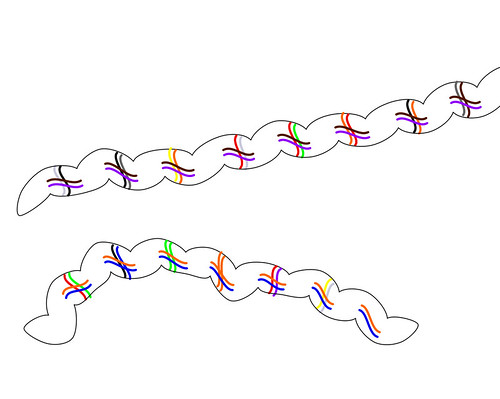
In my numbering system palindromes are not allowed, i.e., because 01 is used, 10 must be skipped. Similarly, because 12 is used, 21 must be skipped. This allows a color-coding that is based purely on color combinations, not color order. Up to 55 weavers can be coded with two color stripes in this way. The association between colors and numerals is the same as in the standard resistor color code used in electronics:
0 = BLACK
1 = BROWN
2 = RED
3 = ORANGE
4 = YELLOW
5 = GREEN
6 = BLUE
7 = VIOLET
8 = GRAY
9 = WHITE
I substituted pale lavender for white in order for the stripes to show up on the white paper. The first crossing (38, 37, 00) becomes (orange/gray, orange/violet, black/black.) While weaving you are only matching color pairs, not thinking about their numerical equivalents, but the numerical equivalents are useful in keeping piles of loose weavers organized.
To allay my concerns that the weaving would get too complicated for me (especially because of the self-crossing weavers,) I first made a posterboard maquette for "Olivier's Fingertip" at 58% scale. By chance I found a good order of working, and the weaving went smoothly.
To simplify cutting, weavers and their glued-on templates are pre-punched with a triangular punch at the sharp indentations of the profile. I slightly rounded the forward corner of the punch with a file to give the cuts a gentler radius. After punching, making the remaining scallop-shaped cuts properly requires both left- and right-handed scissors or shears. Since I have never mastered left-handed scissors (with either hand,) I first make the easy right-handed cuts from the front, looking at the template. Then I flip the work over and make the completing cuts from the back side, working without the aid of the template.
The weaver templates must be packed closely together to avoid wasting material when they are cut out. I don't have a good way of doing this in software. Instead, the templates are coarsely cut loose from the paper printout, arranged by hand, and glued down on a sheet of the material to be used, in this case a sheet of posterboard.
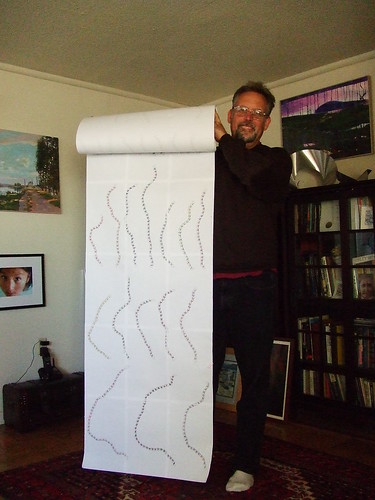
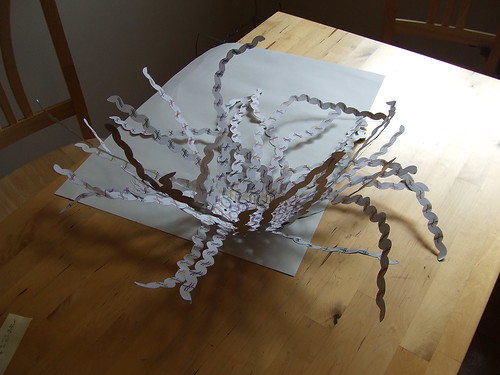
These are the templates for the small-scale cardboard maquette of "Olivier's Fingertip." They were printed from a pdf onto 11" x 14" sheets of paper, and then taped together in a three-wide roll. The weaver on the lower left is the longest one.