Friday, October 27, 2017

Seams in synthetic weaving

Progressively building a higher genus surface (such as a torus) necessarily involves a seam, that is, a frontier where new work joins to older work. When the surface building technique is synthetic weaving, the seams will be invisible in the finished work because synthetic weaving is, in a sense, "all seam." The importance to synthetic weaving of seams has only to do with the order of weaving.


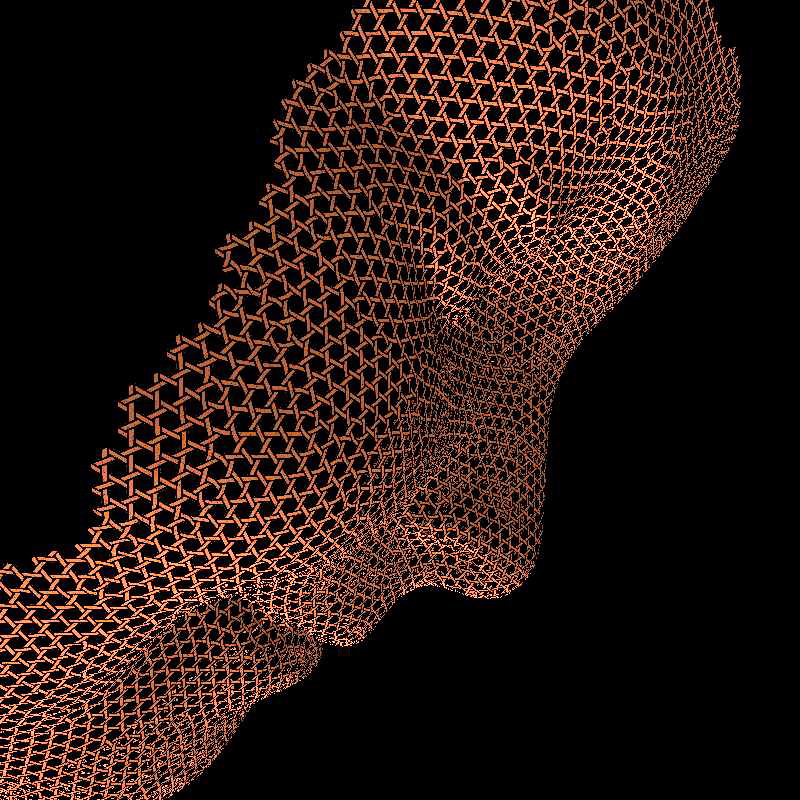
Opening all the seams should leave the work connected and planar: if we find the work is disconnected, unnecessary seams were made; if we find the work is still nonplanar, some unopened seams must remain in the work.

Opened up in this way, the work is a polygon with an even number of edges, two for each seam. This is referred to as a polygonal model or planar model in topology texts.

A planar model corresponds to a single-face map drawn on the surface. Each seam is represented by an edge in the map and two paired edges in the polygonal model. Each edge in the map necessarily borders the single face on both sides, and thus is encountered twice in a walk around the perimeter of the face. In an orientable surface the second passage along the same edge must be in the opposite direction of the first. In algebraic topology the sequence of edges encountered is described by an edge word, such as aba-1b-1, where the inverse indicates traversing the edge in the opposite direction.

For the orientable surfaces that concern us, as the paired edges will always join in the natural, untwisted orientation. Therefore, we can indicate the pairings by simply adding to the polygon diagram some curvy lines connecting edge pairs, as in the figure above.

Many ways of seaming are possible, but only some can encoded in undip efficiently by the addition of a specialized u and d. These are namely the seam designs that can be diagrammed on the planar model without crossing lines (for example, Canonical and Longitude/Latitude in the figure above.) The specialized u and d are only needed for bonds that violate planarity by trespassing on the regular weaving in the interior of the polygonal model.

Canonical starts and finishes one handle at a time. Opposite Sides has all the handles in progress at one time but results in a maximally non-planar diagram. Longitude/Latitude uses nearly twice as many edges as the other designs, has all handles in progress at one time, but is planar, so it can be encoded in undip with just the specialized u and d.

The Longitude/Latitude seam design uses more edges than Canonical, but may be more practical in many cases as it exploits multiple vertices. The dashed lines connect corresponding ends of corresponding edges. The dashed orbits reveal that the number of distinct vertices in the map is three—one fourth the number of edges in the polygon.

Thursday, October 26, 2017

Undip codes on higher genus surfaces

Shuffled Dyck words code hamiltonian 3-regular maps on the sphere. These maps also correspond to synthetic weaving on the sphere, as the loop of wire corresponds to the hamiltonian circuit and each edge not in the circuit corresponds to the bond made by a pair of staples.

Surfaces of higher genus than the sphere can always be cut open into a planar polygon with 2n edges that are to be identified (i.e., paired up and glued back together when the time comes to reassemble the surface.) If the hamiltonian circuit never crosses the polygon, everything will be planar except, possibly, the few bonds that cross the polygon. These bonds may need some supplementary coding to be properly reconnected.

When the polygon in question is a square, the only two orientable surfaces it can represent are the sphere and the torus.

For the sphere, the polygon-crossing bonds reconnect in a way that, as one would expect, can be diagrammed on the plane without crossing lines.

Polygonal model of a spherical surface. Notice that when the closed hamiltonian circuit is traversed in the direction indicated, all polygon-crossing bonds are on the lefthand side (coded by u or d) and are visited in clockwise order.

 Therefore these polygon-crossing bonds are not in any way special and can be undip coded in the usual way along with all the other bonds that do not cross the polygon. Notice that, given the orientation of the hamiltonian circuit indicated all these bonds will be coded by u and d (there will be other bonds coded by u and d that do not cross the polygon, but no distinction need to be made.)

For the torus, the polygon-crossing bonds re-connect in a way that does not permit drawing their re-connection on the plane without crossing lines. However, as evidenced by the drawing below, the re-connection for either of the two cuts can be drawn on the plane, just not both at the same time.

Polygonal model of a torus. Either class of bonds, but not both, can be drawn in the plane without crossings. As drawn, only the pink bonds need special coding.

We could code the the torus above by introducing two new characters for bond connections we cannot draw on the plane. For example, we could use a pink u and a pink d. Pink u's and d's, connect up with each other in the same planar way, they are just, so to speak, drawn on a separate page.

Does a double torus, triple torus, etc., need more colors? The polygonal model for a double torus is an octagon, shown here by subdividing the edges of a square.


Polygonal model of a double torus. When the model is in canonical form, as here (i.e.,  aba'b'cdc'd') the edges fall into two classes ({a, c} and {b, d}), either of which can be diagrammed on the plane. 
A double torus can be cut into a polygon in various ways, but the canonical way gives an octagon with edges ordered a b a' b' c d c' d', as in the drawing above. These edges partition into two classes whose re-connections can be drawn in the plane, just not both classes at the same time. Here again, we just need a pink u and d to code this surface. These two additional characters also suffice for any higher genus orientable surface that has been dissected in the canonical way.

Actually, we do not always have to have a canonical dissection in order to get by with just two additional characters. It suffices to have a dissection that partitions the polygon-crossing edges into two sets, each of which can be described by a parenthesis word. For instance, in a canonical polygon, the parenthesis word for either set happens to be ()()()..., but for our purposes any parenthesis word would serve.

Wednesday, October 4, 2017

Tighter synthetic weaving joins and marking by bend type

The tightest synthetic weaving join occurs when a double-bump bend (follow upper black wire) accommodates a single-bump bend (follow lower black wire.) (The edges shown have not yet been locked by the overlaying of third strands.)
Making the tightest possible join at a synthetic weave's 'crossings' adds a slight complexity since complementary portions (as opposed to congruent portions) must be brought into alignment. On the other hand, these two complementary types of bends can be exploited to indicate 'open' or 'close', without any other sort of marking needed on the scaffold strand.

The basket will still contain edges of both even and odd lengths (as measured in helical half wavelengths.)

A scaffold strand for a synthetic weave can be described by a four letter code (u, n, d, p). This is an 'undip' word as described earlier in this blog, only now the 'photon' edges have shrunk to zero length. Two sequential undip letters can be 'alike' or 'unlike' in two comparisons: up/down and open/closed.

Edges bounded by letters that compare as alike/alike or unlike/unlike will be even in length.

Edges bounded by letters that compare as alike/unlike or unlike/alike will be odd in length.

More concisely, call letter pairs {u, p} and {d, n} opposites. Then an edge has even length if it is bounded by identical letters or by opposite letters. Otherwise, it has odd length.

Same join as above after overlaying third strands.

Thursday, August 31, 2017

Example of a square 2-ply Z with congruent wires

A square 2-ply Z with congruent wires

Wires arranged anti-parallel as they would be upon unwinding.


Wires arranged parallel to show congruency.
This Z is 1.75 mm diameter ABS with a wavelength of 15 mm, and an outside, peak-to-peak height of 5.2 mm in the coiled ribbon orientation. In terms of diameter (d): wavelength is 8.6 d; p-to-p is 3.0 d. Measured flat, outside p-to-p is 6 mm = 3.4 d.

Coiled-ribbon appearance of square 2-ply

Square 2-ply viewed against a lightbox.
Properly-made square 2-ply can be rotated to an angle where its silhouette resembles coiled ribbon. This is the correct rotation for bending Z's.

Schematic of the "coiled-ribbon" appearance of a square 2-ply. 

A common manufacturing fault that prevents such a resemblance is twist.

Z's from square 2-plies with congruent wires

End and side views of a square 2-ply. Lines mark balance points. Bue dot marks the midpoint of a Z that could be formed by making bends around the red pegs.
It is possible to form a square 2-ply Z from congruent wires. In the figure, the blue dot marks the Z's midpoint, and the red circles mark the bending locations for the shortest possible Z. The wires are still congruent after bending.

Longer Z's can be realized by incrementing both bend locations farther out, two balance points at a time (i.e., symmetrically adding a full wavelength to the interbend distance.)

Wednesday, August 30, 2017

Finding balance points

When a square compound 2-ply lies on a horizontal surface, a vertical view will reveal some of the balance points (half of them to be precise) as the places where silhouettes of the two wires cross. These are also points of minimum apparent width.

Cross-section of a square 2-ply pressed against a horizontal surface.


Balance points marked on a square 2-ply


Balance points and congruent wires in square compound 2-ply

For a cut length of square, compound, 2-ply to be composed of two congruent wires, the midpoint of the length must lie at what I call a balance point. Any length will do, so long as the midpoint is at a balance point.


At a balance point in a square 2-ply compound helix, the line joining the centers of the two plies is perpendicular to a radius of the major helix. For example, this 2-ply has been cut exactly at a balance point
For comparison, this 2-ply has been cut just short of a balance point.
When a length of 2-ply is centered on a balance point, diagonally opposite half segments are congruent, and therefore also, the two wires are congruent over their entire length.
As these end-views show, at a balance point the two cut faces of the wires lie parallel to a side of the 'square'. There are four balance points per wavelength.

Tuesday, August 29, 2017

Wire paths in a 3x2 square wire rope

Wire paths in a 3x2 square wire rope. (Actual cross-sections do not remain circular.)
In this animation contacts at the same level can be seen (intra-strand and inter-strand.) In a packed configuration there are additional contacts between strands crossing above/below.

A 2-ply compound helix (where twist and writhe have the same counter-rotating wavelength) always has a crossed-ellipse appearance in cross-section. These 2-plies can "stack" to accommodate any number of plies, e.g., 2x2, 3x2, 4x2, etc.

Friday, August 11, 2017

Using a straight wire for the scaffold strand

Wrapping a 2-ply helix around a straight center strand of the same wire diameter results in a low pitch angle: about 20 degrees vs 40 degrees for a true 3-ply helix.
It is tempting to use a straight scaffold strand in synthetic weaving since this would allow use of a current generation CNC wire bender like the D.I.Wire+. Unfortunately a low pitch angle results, which makes the helical staple strands prone to stretch at the crossings.

Wednesday, August 9, 2017

Synthetic weaving in a nutshell


Every mesh has a weave pattern. To find the pattern, connect the midpoints of the edges around each face (this is known as the medial construction.)

A single wire can trace the weave pattern without crossing itself. To find such a circuit, first find a spanning tree in the dual mesh. The circuit tries to avoid crossing edges in the primal mesh, while never crossing the spanning tree.

Helical 'staples' wind on to make the crossings, and overlap & interlock to form a 3-ply wire basket.

Friday, August 4, 2017

Why synthetic weaving?

A crossing in synthetic weaving. The continuous scaffold strand (orange) visits the entire fabric but makes none of the crossings. Short staples (purple and white) specialize in making the crossings.

The same synthetic weave crossing as seen from the 'wrong' side of the fabric showing the tag ends of the white staples.

Weaving is perhaps our most useful technique for constructing a fabric surface, but it can be unwieldy at large scale. How would you weave a building? If you've ever woven a basket, imagine manipulating a thicket of free ends some meters in length.

Unit weaving, Da Vinci style.
Unit weaving, IQ's style.
Unit weaving,Twogs style.


One solution is unit weaving (nexorades etc.) This is an idea that dates back to Leonardo Da Vinci. Unit weaving solves the problem of scale by weaving very short elements-- basically splices are placed everywhere. The structural weakness of the splices limits the practical application of this approach.

Pre-formed wire crochet.


Pre-formed wire crochet builds a surface from a continuous unspliced wire. The wire's path is loopy which makes it difficult to produce and maintain a precise surface geometry. One special advantage of pre-formed wire crochet is that information the crocheter needs in order to build the surface can be carried in the pre-bending of the wire.

Synthetic weaving.


Synthetic weaving is hybrid unit-weaving and pre-formed wire crochet that derives from mathematical insights into basket weaving, experience with unit weaving, and the scaffold-strand technique being used at Karolinska Institutet in Sweden to self-assemble nanoscale baskets from molecules of DNA.

I use synthetic in the sense of "put together." Even though a single long wire, the scaffold strand, constructs the entire surface (as in crochet) it fails to make any of the necessary weave crossings! That work is left to specialists: short helical unit weavers called staples. In some cases these staples can all be identical, interchangeable, and reuseable. The pre-bent scaffold strand carries complete geometric and working-order information for the weaving. While the scaffold strand does not participate in any of the crossings, it does contribute to the strength of the bond between the two helical strands that wrap around it.

Synthetic weaving is like unit weaving but with very strong splices where all the build information is in a pre-bent wire, and like pre-formed wire crochet but with the straight-line force transfer of weaving.

Monday, July 31, 2017

Non-helical scaffold strand in synthetic weaving

Synthetic weaving with a helical scaffold strand (orange.)
There are good reasons to want to avoid the use of a helical strand for the scaffold. Foremost is that a helical scaffold imposes differential lengths in the weaving due to the problem of like-turns vs alternate-turns.


Since staples go straight, there is nothing special about the radial vertex. Any integer number of vertices (half-wavelengths) is OK. But the scaffold strand must land on a vertex that naturally turns in the desired direction. A non-helical scaffold strand would not have this limitation.

Anothet advantage of a straight (non-helical) scaffold would be the use of standard NC wire forming machine to bend it.

Synthetic weaving of the tetrahelix map

Cyclical bends in the scaffold strand (green) in a synthetic weaving of the tetrahelix map. Work order is from right to left, spiraling upwards: start, 60 up, 120 down, 120 down, 120 down, 60 up, 120 down, 60 up, 120 down, 120 down.

Synthetic weaving technique

Synthetic weaving progressing from left to right, just prior to twining-in the second staple at the vertex in the center of the view.

Synthetic weaving works on any surface

The system of the walk in the medial avoiding the dual's spanning tree is general—it works on any surface, not just the sphere. Weaving of course is also general, so synthetic weaving works on any surface, not just genus zero or orientable, and their is always a free choice of working order.

A-trail (working order) in synthetic hexagonal weaving

An A-trail (green) through a hex-grid portion of the base map. Dashed lines are a portion of the chosen spanning tree in the dual map.

Synthetic weaving

A small sample of synthetic weaving on a square-grid map. The orange scaffold strand follows an A-trail in the medial map.The short staple strands each cover almost two medial edges, producing stiff, 3-ply strut-like sections between crossings.


Staple strands extend straight-across the crossing, producing an 'elastic hinge' joint for the four struts that meet there.


Two A-trails in the medial from two different spanning trees in the dual. No computation needed: the A-trail mirror reflects off of primal edges and spanning tree edges, respecting the latter when there is a conflict.

Sunday, July 30, 2017

Medial manufactures A-trails

OK, now I get it. The map operation Medial turns any map into a literal forest of A-trails—there's one for every spanning tree in the map or its dual!

Find a spanning tree in the dual of the map, then trace along the medial staying within a face of the  primal until blocked (reflected) by the spanning tree.


Baskets have A-trails!

Bridges Waterloo 2017 was great. Thanks to the organizers and Craig Kaplan especially.

I am posting a pdf of my presentation on google drive.

Baskets have A-trails!


Too late to include in my talk, I learned of Anton Kotzig's proof from the 1960's that every genus zero 4-regular map has an A-trail. Wow. Given any map on the sphere, the map operation Medial (which also gives the path of the weavers) converts it into a map with an A-trail. It follows that the weaver pattern (not the weaving) can be constructed by pinching an untwisted loop (like the kids were doing in todays Family Day activity.) By the way, great work guys.

Monday, July 17, 2017

Surface color patterns on 2-color 3x2 Z's with 4:1 turns ratio

A section across a single-phase portion of bicolored 3x2 compound helix with 4:1 turns ratio reveals a symmetrical arrangement of colors

Color pattern on surface of section shown above.
Color pattern on surface of a bi-phase portion of the same compound helix.

Saturday, July 15, 2017

Making some Z's

A two-ply Z made from white and orange Hatchbox ABS.
My current technique for making 3x2 Z's uses just a single anneal, which might be practical to achieve with a hot air gun. 2.44 m lengths (measured between clamps) of white and orange 1.75 mm ABS 3D printing filament from Hatchbox were stretched using as weights two drill press vises (7 lbs. each) dragged along a carpet.
A slow-speed drill was used to twist the pair of filaments counterclockwise. I believe the total number of turns were about 440 (there were some mishaps in the twisting,) or about 180 turns per m of original length.

Three such 2-ply strands were made. The twist was preserved in each strand with a heavy clamp at the drill's end.

Then the three strands were twisted together in the clockwise direction to a pitch of 0.47 turns per cm on the finished rope. My hope was attaining a 4:1 ratio of strand turns to rope turns to keep a neat phase relationship between the two colors. The actual ratio proved to be 3.8:1, which is not nearly accurate enough to maintain proper color phasing along the length of a Z. Oh well, this is just an appearance issue, they twine together fine. The rope was annealed while stretched in place using a hot air gun. This annealing was not as thorough as might be wished as indicated by the slightly pale orange in the pigmented filament.

The 3x2 annealed rope was then unlaid into its three separate strands in preparation for bending and cutting the Z's.


An all-but-finished tetrahedron woven from the Z's.

Wednesday, July 12, 2017

3 vs 2 twists per major wavelength

Three twists per major helical wavelength (left) is a tighter structure than two (right.)
Both the 3-twist (upper) and the 2-twist (lower) are attractive when assembled into a 3-ply.